Friday, March 18, 2011

Grilled Salmon with Roasted Red Pepper Potato Puree

My poor, neglected blog! I have a pile of recipes waiting to be posted, if ever I have the time! This one I came up with tonight, and just loved it, so I'm making the time to post it, damn it! I apologize for the lack of picture. It was really a very pretty plate!

Grilled Salmon with Roasted Red Pepper Potato Puree
4 cloves garlic, peeled
2 pounds russet or yukon gold potatoes, peeled and cubed
2 red bell peppers, cored and cubed
1 large bulb fennel, cored and chopped
2 Tbsps. extra virgin olive oil
salt & pepper, to taste
2 Tbsps. safflower oil
6 6 oz. fillets of skinless
1/4 - 1/2 cup milk or hemp milk
2 Tbsps. butter or Earth Balance stick

Preheat oven to 425F. Combine the garlic, potatoes, peppers, and fennel in a 13 x 9 baking dish. Toss with oil, salt and pepper. Cover with foil, and roast in the oven for 50-60 minutes, stirring twice along the way.

When the vegetables are nearly done, pre-heat a large cast iron grill pan (the kind that goes over two burners) or your outdoor grill. Once hot, add the safflower oil to the grill to keep from sticking. Season the salmon fillets with salt and pepper, and then add to the hot pan, reducing the heat only slightly. Grill for 5 minutes, seasoning the top with salt and pepper. Flip and grill for another 4-5 minutes. Remove from pan.

Once the vegetables are done, transfer to a blender, adding the milk, butter, and additional salt and pepper, if desired. Go easy on the milk, using only enough to make the blender do its job and to make the puree smooth.

Place a large dollop of the puree on a plate, and top with a salmon fillet, garnished with some fennel fronds. Serve with a simple green salad (we did escarole and grape tomatoes with fennel fronds and scallions dressed with balsamic vinegar, olive oil, salt and pepper).

The puree serves as both a sauce for the fish and a side dish. It is thinner than mashed potatoes, and thicker than most sauces. Happy food for toddlers ... my son was covered in it from head to toe!

This dish may take a little time in the oven, but it's very hands-off. The oven and the blender do most of the work, and you can give yourself a pedicure in the meantime.

Serves 6

Tuesday, November 30, 2010

Apple Hazelnut Stuffing

Thanksgiving really snuck up on me this year. Until about a week before the holiday, we had no idea who in the family would be hosting, or who would be coming. As it turns out, most of us went our separate ways to various branches of the family, and we hosted my in-laws. It was a small, very manageable feast for seven (including the baby). I must say, while there is something to be said for large holiday meals, they can also be very stressful, and this meal was not so. It came together easily, from start to finish, in the course of 3 days.

Although Christmas dinner doesn't happen in my house, I can imagine that this stuffing might be a very welcome addition to such a holiday feast, especially at one that includes those of vegetarian persuasion. So, perhaps it isn't too late to post it. It also happens that one of the key ingredients, ghee, also makes this recipe quite appropriate to enter into the Pure Indian Foods Ghee Recipe Contest. And that is another reason to post it. Incidentally, (and this endorsement is not at all required for the sake of the contest), this is the brand of ghee that I use. It is locally made (to me), it is made from grass-fed, organic milk, and it saves me the trouble of making my own ghee. It also happens to be OK for my milk-allergic son to eat. Apparently, ghee, being absent of milk solids, is also lacking lactose and casein. Let me stress that I am not and cannot give medical advice on this (or any) subject, and I do not recommend that anyone with a dairy allergy or intolerance eat ghee without consulting his/her health care provider first. For us, it was very freeing to discover that we are able to use ghee, instead of oil, to cook and flavor the foods we eat. That buttery aroma was well-missed in this household!

Apple Hazelnut Stuffing
4 cups whole grain fresh bread (wheat, spelt, rice), cubed
1/3 cup hazelnuts, chopped
1/2 large onion, chopped
3 cloves garlic, minced
1/4 cup ghee + 3 Tbsps.
1 stalk celery, chopped
1 apple, peeled & chopped
3 Tbsps. fresh sage, chopped
1 - 1 1/2 cups low-sodium veggie stock (depending on how moist you like your stuffing)
salt & pepper, to taste

Preheat oven to 425F. If the bread is fresh, toast the bread in the oven on a dry cookie sheet for 10 minutes. If it's stale, skip this step. Toast the hazelnuts on a dry cookie sheet for 5 minutes. Transfer the bread cubes and hazelnuts to a large bowl. Reduce oven temperature to 350F.

In a saute pan, melt the 1/4 cup of ghee over medium heat. Sweat the onions and garlic in the ghee until softened, about 10 minutes. Add the celery, sauteing an additional 5 minutes. Season the onion mixture with salt and pepper. Pour the onion mixture over the bread cubes and hazelnuts, and toss well. To the bowl, add the apples and sage, tossing once again.

Warm the veggie stock, and add in small increments to the bread mixture, tossing after each addition, until you reach the desired consistency (the oven will dry it out somewhat, so aim for a bit more moistness than is your preference). Season with salt & pepper.

Using 1 Tbsp. of ghee, grease a large casserole. Transfer the stuffing mixture to the prepared casserole. Using the remaining 2 Tbsps. of ghee, dot the top of the stuffing with small fingerfuls. Bake, uncovered, for 1 hour.

Serves 8-10.

Saturday, November 6, 2010

Chocolate Pumpkin Layer Cake with Cashew Icing

On Halloween, my family got together to celebrate the sweetest day of the year, but we also took the opportunity to mark my brother's and my birthdays, which fall in late October and early November. I made the cake for the occasion (and my brother made lunch). This is the cake that I came up with. A little something for everyone - chocolate for those who think every dessert needs chocolate (my husband), pumpkin spice cake for those who like to taste and smell the season (my brother and me), and sticky sweetness to please the Halloween palate.

Although this is no health food cake, it is much more redeeming than most store-bought (or even homemade) cakes, so a little less guilt is in order. The recipe is very loosely based on this one. Enjoy!

Chocolate Pumpkin Layer Cake with Cashew Icing
1 cup unbleached white flour
3/4 cup whole wheat pastry flour, plus 1/3 cup more
1 cup turbinado sugar
1 1/2 tsps. baking powder
1 1/2 tsps. baking soda
1/2 tsp. ground cinnamon
1/8 tsp. ground nutmeg
1/8 tsp. ground allspice
1/8 tsp. ground cloves
1/8 tsp. ground ginger
1/4 tsp. salt
1/3 cup cocoa powder
1 cup vanilla unsweetened hemp milk
1 1/2 cups pumpkin puree (for fresh pumpkin, steam the pumpkin and then puree in a blender with a small amount of water)
3/4 cup sucanat
2 large eggs
1/4 cup coconut oil, warmed until liquified
1/4 cup agave nectar
1 Tbsp. vanilla extract
Cashew Icing (recipe below)

Grease two 9" round cake pans. Line the bottom of each with parchment paper and then dust the sides with flour. Pre-heat oven to 350F.

Combine the white flour, 3/4 cup of the whole wheat flour, turbinado, baking powder, baking soda, spices, and salt in a bowl. Divide the dry mixture equally (by weight) into two bowls. Into one bowl, add the cocoa and whisk to combine. Into the second bowl, add the 1/3 cup of whole wheat pastry flour, and whisk to combine.

In a large bowl using an electric mixer, beat 1 cup hempmilk, pumpkin puree, and sucanat. Beat in the eggs. Then add the oil, agave, and vanilla, beating just to combine. Divide the liquid mixture evenly (by weight) into two bowls. To one bowl, add the cocoa mixture, stirring until just combined. To the second bowl, add the second dry mixture, stirring until just combined. Do not overmix!

Transfer batter to the prepared pans (the contents of one bowl into one pan and the contents of the other bowl into the other pan). Bake about 40 minutes, or until a wooden toothpick inserted into the center of the cakes comes out clean. Cool on a rack. Invert onto a work surface and remove the parchment papers carefully. Cool the cakes completely before proceeding.

Slice each cake horizontally to create four layers in total (to guide your knife in evenly cutting the cakes, place toothpicks just below the midpoint of the cake all around the cake, and cut using a serrated knife just above the toothpicks, as illustrated here).

Place a pumpkin layer at the bottom of your cake dish. Apply a thin layer of icing on top using a frosting spatula. If the icing is too thick, it will move to the edges and drip down the sides. The icing will seep into the cake somewhat, and that's fine. Add a chocolate layer, and top with a layer of icing. Repeat with the remaining layers of cake and icing. On the top layer, add a thicker layer of icing. Add a thin layer of icing to the sides of the cake.

If you are not serving the cake right away, store in the freezer. This will keep the icing from either dripping too much or getting too absorbed into the cake. Defrost at room temperature 2-3 hours before serving.


Cashew Icing
1 1/2 cups cashew butter
4 1/2 cups confectioner's sugar
1/8 tsp. cinnamon
1/8 tsp. allspice
1 1/2 tsps. vanilla extract
1/2 tsp. chocolate extract
1/2 cup vanilla unsweetened hemp milk

Combine all ingredients in a large bowl, and beat well with an electric mixer.

Thursday, November 4, 2010

Roasted Vegetable Pear Soup

One of the issues many people face in subscribing to a CSA is that they are left with produce that they would not normally buy, or that is unfamiliar to them. Enter soup - the greatest vessel for miscellaneous foods that have no home.

I make most vegetable soups vegan, but I thought this soup might do nicely with some meat flavors, and I think that was a good decision. This soup has a pork stock base, which marries particularly well with the pear, pumpkin, and beets. The pork stock adds not only flavor, but also lots of nutrients, most notably calcium. If you prefer to make this soup vegan, it would still be very tasty using a vegetable or onion stock, or even plain salted water.

This soup can be prepared as a puree or as a chunky soup. I think the latter is really the better option, but I made it as a puree so that my little guy could eat it more easily (and so he has!). The recipe below is written as a puree with noted adjustments to make it chunky instead.

Roasted Vegetable Pear Soup
2 lb. pumpkin (or other winter squash), seeded, peeled and cubed (small dice for chunky)
1 small rutabaga, peeled, trimmed of ends, and cubed (small dice for chunky)
12 small turnips, trimmed of ends and cubed (small dice for chunky)
3 medium carrots, peeled, trimmed of ends, and cut into thick slices (small dice for chunky)
2 medium beets, peeled, trimmed of ends, and cubed (small dice for chunky)
3 shallots, peeled and quartered (chopped for chunky)
2 stalks celery, cut into chunks (small dice for chunky)
2 Tbsps. olive oil
2 Tbsps. safflower oil
salt and pepper, to taste
1 1/2 lbs. pork neck bones (your local sustainable meat farmer will likely have this very inexpensive treat in the freezer)
1/4 cup apple cider vinegar
3 ripe pears, cored, peeled and cubed
2 bay leaves
10 cups water
1/4 cup chopped fennel fronds

Pre-heat the oven to 425F. Combine the pumpkin, rutabaga, turnips, carrots, beets, shallots, celery, and oils in a large covered baking dish. Season well with salt and pepper. Cover and roast for 1 hour and 20 minutes, stirring twice along the way.

Transfer roasted vegetables to a large stock pot. Add the pork necks, vinegar, pears, bay leaves, water and additional salt and pepper. Bring to a bubble, and then reduce heat to medium low. Simmer, covered, for 2 hours.

Remove bones and bay leaves. Pick apart the meat from the bones, and set aside (roughly 1/2 - 1 cup).

Using an immersion blender (or a regular blender), puree the soup (if you prefer a chunky soup, skip the pureeing). Return the meat to the pot. Add the fennel fronds. Adjust seasonings. Serve hot.

Serves 10-12.

Wednesday, November 3, 2010

Almond Cod Cakes with Roasted Garlic Spread

This dish looks very sophisticated, if I do say so myself, but it's very simple. So simple, in fact, that my 15-month-old kept asking for more fish! It's even fairly simple to make, and is perfect for anyone who is not a big fan of chopping. The food processor does all the chopping for you.

Because my little one is allergic to half of the food web, I find myself making many adjustments that I wouldn't normally make, and sometimes the dish turns out better than it would have with traditional ingredients. In this case, instead of using bread crumbs (or wheat-free bread crumbs) in the fish cakes, I decided to use almonds (almond meal). The almonds give the cakes a much more interesting flavor, and because the cakes are pan-fried, the almonds were very aromatic, too. The downside to accommodating my son is that I could not use an egg to bind the cakes, and they would have benefited from some binding. Leaving the egg out leaves the fish cakes a bit crumbly. Fortuitously, the crumbliness was the perfect texture for my son, and the rest of us did fine. Even so, if you can have eggs, I would add one to the mix.

I served these fish cakes with forbidden rice with chopped cilantro and a simple green salad.

Almond Cod Cakes with Roasted Garlic Spread
1/2 cup raw, unsalted almonds (or almond meal)
12 oz. cod fillets, cubed
2 Tbsps. fresh cilantro
2 Tbsps. fresh Italian parsley or celery greens
3 scallions, cut into 2" lengths
1 1/2 tsps. salt
pepper, to taste
1 egg (optional)
1/4 cup olive oil
Roasted garlic spread (recipe below)

Process almonds in a food processor until they resemble coarse bread crumbs. Remove and set aside in a large bowl. Into the food processor, add the cod, cilantro, parsley, and scallions. Pulse to combine. Do not overprocess. Some small chunks of fish should remain. Add the fish mixture to the almonds, along with salt, pepper, and egg. Mix thoroughly, and form into patties.

Pre-heat the oven to 350F. Heat a large cast iron skillet over high heat. Once hot, add half the olive oil to the pan and swirl to coat. Allow the oil to heat for a moment, then place the cakes in the hot pan. Turn the heat down to medium-high, and allow the cakes to cook 5-6 minutes on each side. Add additional oil, if necessary, when it's time to turn the cakes. Put the skillet in the oven for 10 minutes to finish cooking through.

Makes 4-5 large cod cakes.


Roasted Garlic Spread
1 head garlic
1/4 cup olive oil
1/2 tsp. salt
1 Tbsp. lemon juice
1 tsp. fresh cilantro, chopped

Pre -heat oven to 425F. Slice off the top of the garlic so that the top tips of the cloves are just showing. Wrap the whole head of garlic in foil and place on a cookie sheet. Roast in the oven for 45 minutes (can be done a couple days in advance, whenever you have the oven on). Allow to cool. Squeeze the garlic out of the papery skin. The roasted garlic should be very soft and fragrant.

In a small bowl, combine the roasted garlic with the olive oil, salt, and lemon juice. Whip the ingredients together with a fork until they become smooth and creamy. Stir in the cilantro. Top each of the cod cakes with a small dollop of the garlic spread.

Serves 4-5

Friday, October 29, 2010

Kohlrabi Mashed Potatoes

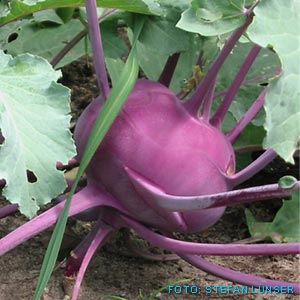
I never know what to do with the kohlrabi that I get in my CSA box. They can be thrown into salads raw, they can be braised, and they can be roasted, although I've never thought they brought anything to the dishes (the greens of kohlrabi are quite another story ... for another post). This time, I tried making mashed potatoes with them ... with much the same result ... they still don't bring much to the dish, but they add some nutritional value to a side dish that is most often pretty empty, and I'm happy with that, and everyone was happy eating these mashed potatoes.

I chose to make these mashed potatoes vegan, mostly because my son is allergic to dairy. They can be made with more traditional ingredients (butter, cream, milk), if you prefer.

Kohlrabi Mashed Potatoes
4 kohlrabi bulbs, peeled and cut into chunks
1 1/2 lbs. red fingerling potatoes, washed well and cut into chunks (keep skins on)
2 Tbsps. cilantro, chopped
salt and pepper, to taste
2-6 Tbsps. unsweetened hemp milk, depending on preferred consistency
2 Tbsps. Earth Balance buttery stick

Combine the kohlrabi and potatoes in a large saucepan. Cover the vegetables completely with cold water, adding a 1/2 tsp of salt. Bring to a boil, reduce heat to medium and continue to boil until the vegetables can be easily pierced by a fork. Drain.

Transfer vegetables to a large bowl and mash with a potato masher. Stir in the remaining ingredients. Serve.

Serves 8.

Lentil Roast with Acorn Squash, Turnips & Carrots

Talk about cheap! Yes, I haven't talked about cheap in quite some time. Not that I don't still revel in cheap, good food (not to be confused with cheap bad food, of which there is so much that no one in their right mind would bother blogging about it). While expensive food finds its way onto my dinner table from time to time, I have to keep to a pretty tight budget, like most folks these days, and I do everything I can to keep costs low.

That said, I am not in the habit of compromising about food. Quite the opposite! We eat delicious and healthy food at every meal. We just eat less of those things that make most Americans gluttons (meat), and we eat more of the things that most Americans avoid like the plague (veggies).

This recipe is a great example of that kind of eating. The protein is organic green lentils (which I bought in bulk on sale for the dirt cheap price of 66 cents/lb.), the veggies are nearly all from my CSA (to learn more about CSAs and other local food buying options, check out my post about that sort of thing), which means I used about $7 of produce on this meal. I served this stew/roast over kohlrabi mashed potatoes (the kohlrabi was also from the CSA, and the potatoes were local). The whole stew cost about $10, and it serves about 8. Wow! That's $1.25 per serving ... big servings! You can't even do that at McDonald's!

If the cheap, healthy, and green of this meal weren't enough, it's also incredibly easy (and one pot ... well, one baking dish), and it was a hit with the kids ... especially the baby!

Lentil Roast with Acorn Squash, Turnips, & Carrots
1 lb. green lentils, rinsed and picked over
1 small acorn squash, peeled, seeded and cubed
6 small turnips, trimmed of ends and cut into 1" chunks
3 medium carrots, peeled and cut into 1" chunks
3 medium tomatoes, chopped
3 cloves garlic, minced
1 medium onion, chopped
1 bunch cilantro, chopped
2 cups homemade or low-sodium veggie stock
1/4 cup olive oil
1 1/2 Tbsps. garam masala
salt and pepper, to taste

Preheat oven to 425F. Combine all ingredients in a 13 x 9 glass baking dish. Cover with foil. Bake for 1.5 hours, stirring every 30 minutes, and adding water if necessary. Serve over kohlrabi mashed potatoes.

Tuesday, September 7, 2010

Rosh Hashana Honeycake - for Everyone

Rosh Hashana, the Jewish New Year, is a day away, and so it's time to break out the honeycake recipe. Honeycake is my favorite part of Rosh Hashana, intended to help usher in a sweet new year. Of course, given most people's new year's resolutions to get healthy or to lose weight, maybe honeycake isn't the best choice. Still, traditions are hard to break ... and honeycake is too good to pass up. So, I just do what I can to make my honeycake a little healthier.

Here is my take on my Grandma Sarna's honeycake, with variations noted for the allergy-prone or vegan baker:

Whole Wheat Honey Cake
1 cup hot water
3 tsps. instant espresso
1/4 cup orange juice
1 1/2 cups honey
3/4 cup sucanat
3/4 cup safflower oil
1 egg (or 1/4 cup chia gel or 1 mushed banana)
1 1/2 cups whole wheat flour (or barley flour)
1 1/2 cups unbleached all purpose flour (or barley flour)
1 tsp. baking soda
1/2 tsp. cinnamon
1/8 tsp. cloves
1/4 tsp. salt

Grease a bundt pan with coconut oil or butter, and dust with flour to keep the batter from sticking. Pre-heat the oven to 325F.

Dissolve the coffee into the hot water. Then add the orange juice to the coffee. In a large bowl, combine the coffee mixture, honey, sucanat, and oil, whisking together well. Allow to cool well before adding the egg, chia gel, or banana to the mixture.

In a separate bowl, sift together the flour(s), baking soda, cinnamon, cloves, and salt. Add the dry ingredients to the wet, mixing together until just combined (don't overmix!). A little lumpiness is fine.

Bake for 45 minutes to an hour. Allow to cool in the pan for an hour before turning out onto a serving dish. If desired, dust with powdered sugar or serve with ice cream (or non-dairy ice cream ... like this one!).

Serves 20.

Saturday, September 4, 2010

Potato Chickpea Pancakes

I must apologize for the long delay in posting. Life has been a whirlwind, and I'm a bit over-committed at the moment. That said, I will still post from time to time, whenever I get a chance to come up for air. I hope you'll be patient with me.

As we are in the process of readying our house to sell it, I've been going through all the nooks and crannies, and finding all sorts of interesting forgotten things. One thing that I found was a pantry item - chickpea flour. Ah, yes, I bought some chickpea flour several months ago to make falafel balls, and somehow I bought way too much. It's been sitting there ever since with no purpose, unless I make a lot of falafel balls. So, I racked my brain, and came up with these very tasty potato pancakes - a vegan/vegetarian complete meal all on its own, good for breakfast, lunch, or dinner. Very seasonal! Very cheap! Very tasty! Very gone!

Potato Chickpea Pancakes
1 lb. potatoes, peeled and grated
1 medium onion, grated
1 medium zucchini, grated
2 scallions, thinly sliced (whites and greens)
1/3 cup olive oil, + 2-3 Tbsps. for frying
1/3 cup chickpea flour
salt and pepper, to taste
Yogurt Cardamom Sauce (optional) - recipe follows

In a large fine mesh sieve fitted over a large bowl, squeeze the excess moisture out of the potatoes and onions. Allow the excess water to settle in the bowl for five minutes, and then pour the water off gently, leaving the starch at the bottom of the bowl. In the same bowl, combine the starch, potatoes, onions, zucchini, scallions, 1/3 cup of olive oil, chickpea flour, salt, and pepper.

Heat a large cast iron skillet over high heat. Once hot, add about 1/2 Tbsp. of the remaining olive oil and reduce heat to medium. Spoon the potato batter into the skillet in flapjack size pancakes, and flatten the batter so it cooks evenly. Cook 3-5 minutes on each side. Fry pancakes in batches, adding additional oil between batches, as necessary. Keep the pancakes that are done in a warm oven (275F) until ready to serve.

Makes 12 pancakes.

I served this dish with a yogurt cardamom sauce and a side of quinoa tabouleh.

Yogurt Cardamom Sauce
1/4 cup plain yogurt
1/8 tsp. salt
pinch ground cardamom
1 tsp. fresh lemon juice

Combine all ingredients. Place yogurt mixture inside a fine mesh sieve lined with cheescloth, and allow to drain over a bowl for 20 minutes. Serve a dollop on each pancake.

Monday, May 24, 2010

Homemade Southwestern Pork Sausage

I didn't set out to make sausage myself. Originally, I was looking to serve some kind of game meat at my daughter's bear birthday party. Sometimes, after the spring thaw, bears eat animals that were trapped in snow or ice, so I thought game meat would work nicely with the theme. I tried to find venison or elk meat to serve, and thought that sausage would probably work best for grilling. Unfortunately, I couldn't find a source that I trusted, and buying wild game from hunters is illegal. Having gotten excited about the idea of serving sausage at the party, I went in search of some local, sustainable sausage of the more domestic kind. I found some, but none that really spoke to me.

What to do? What to do? A crazy voice inside of me blurted, "Make your own sausage!" "Yeah, right!" I said back (to myself). "I don't know the first thing about sausage-making, and this is an expensive undertaking for me to possibly louse up!" So, I did a little research ... very little research, and I made some calls to see if I could get my hands on some sausage casings (pig intestines). I scored some free casings at a local butcher shop, and I knew that was sign that I had to make sausage, know-how or no.

The general consensus about making sausage seems to be that it is necessary to have a meat grinder, or that meat must be ground to specification (coarse grind or fine grind) by a butcher. I found nearly universal recommendations to use a sausage stuffer, as well. One butcher practically bet me that I would be back to ask him to make my sausage for me. I nearly spent quite a lot of money on equipment, very unnecessarily, until I had a epiphany. I didn't want to invest $50-100 on stuff that I might never use again. Instead, I took a chance and decided to buy ground meat (coarse? fine? eh, whatever ...) and stuff the casings using a pastry bag fitted with a large tip. If even a pastry bag is an iffy investment for you, try just buying the tip ($1-2) and use it with a plastic bag.

I was absolutely exhilarated by the prospect of making something so out of my element. What an incredible experience! It was messy, to say the least, but it was also a lot of fun. I don't recommend doing this with young kids, just because there is a lot of raw meat involved, but older kids (maybe 9 years+) would probably do very well with it. Just make sure to encourage frequent hand-washing and counter-wiping.

I tried to avoid reading recipes for sausage-making, knowing that most are made with dried spices. I wanted to make something fresh and light. Yes, "light sausage" is a bit of an oximoron, but indulge me. So, I decided to go with Southwestern flavors.

I have no regrets at all about the way I went about this. Sometimes diving head-first into the unknown is the best way to get experience. Sometimes re-inventing the wheel isn't a waste of time. So, try this recipe, or make up your own, or make some other wacky dish that pleases your inner risk-taker.

Southwestern Pork Sausage
10 lbs. sustainably raised organic ground pork
natural pork casings for 40 sausages (ask your butcher to give you a little extra in case some parts split)
1 bunch cilantro, chopped
5 jalapenos, seeded and chopped
1 bunch scallions, sliced thinly
1 12 oz. jar roasted red peppers, chopped
10 cloves garlic, minced
salt and pepper to taste

Work in batches of about 3-4 lbs. of meat at a time.

In a large mixing bowl, combine pork, cilantro, jalapenos, scallions, red peppers, and garlic. Season with salt and pepper, and mix well with your hands.

As a test, cook a tablespoon or so of the meat mixture in a hot skillet to make sure it's seasoned properly, and adjust seasonings as needed.

Scoop some of the meat mixture into a pastry bag fitted with a large tip. Place the end opening of the casing around the tip, and carefully pipe the meat mixture into the casing, pulling the mixture down into the casing. Be careful not to be too forceful as the casing can tear. Once you have about 2-3 feet of casing filled, pinch the sausage every 5-6" to create individual links. Twist the casing between links a few times. There is no need to tie between links; only at the ends. Repeat this process until you have filled all of your sausages.

Sausages can be frozen or refrigerated before use. When you are ready to cook them, cut apart the links. Grill or broil them until cooked through. Serve in a whole wheat hot dog bun with Cabbage, Fennel, and Jicama slaw and some mustard.

Makes 35-40 links.

Notes:
- Be careful to keep casing and meat mixture cold. If you find the meat temperature rising to a point where it does not make your hands cold to touch it, return it to the fridge for a while before progressing.
- This recipe is not spicy (hot) despite the jalapenos, so if you like things mild, you'll probably like this as is. But if you want some more kick, go for it!

Saturday, May 22, 2010

Baked Tofu with Bamboo Shoots and Snow Peas

In making up the menu for my daughter's bear-themed birthday party, it was easy to find things to make that reflected the diets of brown and black bears. For one thing, they live in the same regions of the world as we do, so the foods available to them are the foods available to us. Black and brown bears are also omnivorous, as are humans, and they eat a wide variety of foods, as do humans. The greater challenges came with the diets of Pandas and Polar bears. Polar bears eat seals and Pandas eat bamboo almost exclusively. I admit, I finally gave up on trying to find a way to get Polar bears represented in the menu. For the Panda bears, I thought I ought to make something with bamboo shoots, and so, this salad was born (not that any Panda would eat it):

Baked Tofu with Bamboo Shoots and Snow Peas
2 lbs. firm tofu
1/2 cup soy sauce
1 Tbsp. sesame oil
3 Tbsps. brown rice vinegar
3 cloves garlic, sliced thinly
1/4 cup orange juice
Coconut oil
2 Tbsps. orange zest
1 lb. snow peas, trimmed of ends and halved
2 15 oz. cans sliced bamboo shoots, drained

Place the tofu in a medium bowl. Place a plate on top of the tofu and weigh the plate down with something heavy, like a can. Place the weighed-down tofu in the refrigerate to drain overnight. Pour off the liquid. Cube the tofu and set aside in a covered container.

In a medium bowl, combine the soy sauce, sesame oil, vinegar, garlic, and orange juice. Pour the
mixture over the tofu and allow to marinate for 1 hour, turning the tofu midway through.

Pre-heat the oven to 300F. Prepare a large cookie sheet by greasing it with coconut oil. Remove the tofu from the marinade (reserve marinade) and spread around the cookie sheet in a single layer. Bake for 1 - 1 1/2 hours, turning every 30 minutes.

In a large salad bowl, toss together baked tofu, orange zest, snow peas, and bamboo shoots. Dress with remaining marinade. Serve cold or room temperature.

Serves 20-25 as a side dish

Thursday, May 20, 2010

Salmon Balls

Based on my salmon burger recipe, these little balls are a party hit! They are very easy to make, healthy, inexpensive, and very tasty. They're casual enough for kids' parties and fancy enough to serve at cocktail parties.

Salmon Balls
3 14.75 oz. cans wild Alaskan red salmon
1 ½ cups rye bread crumbs (made with 100% rye bread, crumbled in a food processor)
4 large eggs, lightly beaten
6 Tbsps. tomato paste
2 Tbsps. dried thyme, crumbled
3 Tbsp. dried parsley flakes
3 Tbsp. dried chopped onion
1 Tbsp. garlic powder
Salt & pepper, to taste
Safflower oil spray
Mustard

Pre-heat oven to 375F. Combine all ingredients (except safflower oil) in a large bowl. Mix well with your hands or a wooden spoon. Form into 1 1/2" balls. Grease two cookie sheets with safflower oil. Place balls on sheet, 1" apart. Bake for 15 minutes, turn balls, and bake for an additional 10 minutes.

Serve hot or at room temperature with brown mustard.

Makes about 7 dozen balls. Serves 50 as an hors d'oeuvre.

Tuesday, May 18, 2010

Mini-Spinach Knishes

I knew I had to make something with potatoes for my daughter's bear birthday party, partly because bears apparently eat potatoes, but also because potatoes tend to be crowd-pleasers. Short of making potato salad (been there, done that), there aren't too many dishes to make with potatoes that can easily be served to a crowd in a park. So, I thought, why not knishes? As is par for the course for me, I make things for the first time when serving them at parties, and such is the case with these knishes. They were good, but not fabulous. A little wheat and egg would have done a world of good for the crust.

This recipe is based on this recipezaar recipe. I substituted cannellini beans for the tofu and I added spinach to the filling. Otherwise, very little is changed here. Here is my version:

Mini-Spinach Knishes
2 cups mashed yukon gold potatoes (1 1/4 lbs. boiled potatoes with 2 Tbsps Earth Balance stick, 1/4 cup milk substitute, and salt to taste), divided
3 cups barley flour
1 tsp. baking powder
1/2 cup cold water
1 cup chopped onions
2 Tbsps. olive oil
1 1/2 cups cannellini beans
1/2 bunch of spinach
3 Tbsps. parsley
1/2 tsp. garlic powder
1/4 tsp. ground black pepper
salt, to taste
safflower oil
milk substitute (soy, rice, almond, oat, hemp, etc.)
brown mustard

Combine 1 cup of the mashed potatoes with the barley flour and baking powder. Add the water, and mix well. Knead into a smooth dough. Let the dough rest in a glass bowl covered with a damp kitchen towel for 30 minutes.

While the dough is resting, heat the olive oil in a small skillet. Saute the onions in the oil until soft. In a food processor, combine the cooked onions, cannellini beans, spinach and parsley. Process until fairly smooth. Combine processed mixture with 1 cup mashed potatoes, garlic powder and black pepper. Season with salt, to taste.

Pre-heat oven to 350F. Line a large cookie sheet with parchment paper, and brush the paper with safflower oil.

Cut the dough into four sections, rolling each one out separately to 1/8-1/4 inch thickness. Using a medium-sized biscuit cutter, cut rounds from the dough. Drop 1 Tbsp of filling in the center of half the circles. Then top the filled circles with empty circles, pinching along the perimeter to seal the knishes (to look like raviolis).

Place the knishes on the prepared cookie sheet, about 1 inch apart. Brush each knish with a little milk substitute. Bake for 25 minutes. Serve warm or at room temperature with brown mustard.

Makes about 4 dozen knishes.

Bear Break-Fast Salad

What does a bear eat when he wakes up after months of hibernation, skinny and starving? No, he doesn't pounce on the first wild boar he encounters. He eats a lot of fresh, springtime sprouts and other plant life. So, at my daughter's bear-themed birthday party, I served a salad inspired by a bear's break-fast. If it satisfies an eight hundred pound ravenous bear, it ought to quiet the belly of a 34.5 lb. four-year-old.

Bear Break-Fast Salad
2 bunches dandellion greens, tough stems removed, leaves torn into bite-size pieces
1 container alfalfa sprouts
2 bunches fresh oyster mushrooms
1/2 cup pine nuts
2 navel oranges, supremed (see note below)

Toss ingredients in a large bowl. Serve with salad dressing of your choice.

Serves 20-25 people as a salad course, or 40-50 people as a side dish.

Note: To supreme an orange, cut the top and bottom off the orange, and then cut the rind and pith away from the sides, cutting from top to bottom. Remove individual orange sections by cutting between the orange membranes, so all you have at the end are segments of orange flesh.

Basic Balsamic Vinaigrette

This is your basic go-to salad dressing. Easy to make, healthier and cheaper than bottled dressings, and goes with just about any green salad. Keep it in a glass bottle in the fridge, and use it whenever.

Basic Balsamic Vinaigrette
1/2 cup balsamic vinegar
1 Tbsp. stone ground mustard
1 1/2 tsps. dried basil
3/4 tsp. onion powder
1/2 tsp. garlic powder
1 tsp. salt
20 grinds of fresh pepper
1 cup extra virgin olive oil

Combine vinegar, mustard and spices in a bowl, and whisk together to combine. Slowly drizzle in the olive oil, whisking constantly, until emulsified. Pour into a glass bottle, and use as needed. If the dressing separates, shake vigorously before using.

Note: Olive oil will get cloudy and solidify in the fridge. Take the dressing out about 30 minutes before you need it, and the olive oil should return to a liquid, clear state.

Happy Bear-Day!!!

My daughter recently turned four, and she requested that the theme of this year's birthday party be about bears. Last year's party was about birds (the details of which can be found here). As I often try to do, I made the food reflect the theme, at least in part. I tried to make foods that bears eat, and fortunately, bears eat a lot of things, ranging from sprouts to tubers to fish to bamboo to blueberries. Lots of fun to come up with a menu. I did stray a bit from the theme here and there, but mostly, I kept to it. This is what I served:

Just for the Kids, I made a Bear Food Face Buffet. The idea here is that the kids get to make a bear face out of food, and then eat it. The kids really enjoyed this, and the parents seemed to, too. My daughter and I make food faces all the time, and it's always a hit. The great thing about the prep for this is that it takes virtually no cooking. It's just some chopping and shredding, and some things just need to be put in a bowl as is. The kids really do all the work! These were the buffet items:

- brown rice
- yogurt
- shredded lettuce
- alfalfa sprouts
- shredded carrots
- sliced kiwis
- hardboiled eggs
- grapes
- cashews
- peas
- olives
- broccoli florets
- mushrooms
- sliced beets
- grilled shrimp
- orange sections
- carrot circles
- celery semi-circles
- grape tomatoes
- blueberries
- very small cheese cubes
- pine nuts

I served a balsamic vinaigrette on the side, for those who wanted.

For the adults, and kids who wanted, I served:
- Bear Break-Fast Salad (made of things bears eat when they awaken from hibernation) with the balsamic vinaigrette above.
- Mini Spinach Knishes (wheat and egg-free)
- Salmon balls (wheat-free)
- Baked tofu with bamboo shoots and snow peas
- Southwestern Pork Sausages (made from scratch!) on Whole Wheat Buns
- Refried Bean Sloppy Joes (vegan alternative to sausage)
- Cabbage, Fennel, Jicama Slaw (a condiment for sausage and/or refried beans, or a side dish)

For desserts (kids and adults alike), I made:
- Bear-face mini-honey cakes with vanilla frosting
- Vegan lemon curd cups with blueberries
- Chocolate whole wheat bear cut-out cookies
- Berry Beary Plate (strawberries, raspberries, blackberries, blueberries, kiwis)

Ordinarily, I don't make drinks and serve just water, or sometimes water and hot tea. Given the 85 degree weather we had, hot tea would not work at all. So, this year, I also made blueberry lemonade.

Most of the food went over very well, but a few dishes need some tweaking. Although lots of people commented that they enjoyed the knishes, the dough was a little challenging, I thought, and that's mostly to do with the lack of wheat. Unfortunately, that couldn't be helped, unless I was willing to forgo eating them (and really, I was not too keen on that option).

The lemon curd, which was delicious when I made it two days earlier, had become a bit too tart by party time. The leftovers of the curd got progressively more and more tart as the days past until I couldn't bear to eat it anymore. A lesson learned about lemon curd. Next time, I'll make it the day of, or I'll just sweeten it much more.

The sausage, which I think was one of the best things I ever made, hardly was eaten, because by the time it came off the grill, people had already had their fill of food, and were looking for dessert. On a positive note, one dear friend of mine, who did eat a sausage, asked where I bought it ... it took a lot for me not to squeal with glee that I made it myself. That was a satisfying moment.

It was really a great party overall, and one that I think my daughter will remember for a long time. There are so many ways to celebrate with kids, and the party food is supposed to help make their day special and memorable. That's something pizza and ice cream cake just can't do.

Sunday, May 9, 2010

Potato Hash

Potato hash is one of those basic go-to dishes that I make when I need something quick, or when I want to get rid of some leftovers. Certainly, leftover potatoes can be used to make a hash, but just about any leftover veggies can be tossed in, as well. A hash can be a side dish for breakfast, a quick lunch, or a complement for an egg at any meal of the day. Best of all, it's a very cheap and healthy way to fill your belly.

This mother's day, I made a hash with some leftover slaw, which was mostly cabbage, fennel and jicama. Try making this with whatever you have in the fridge.

Potato Hash
2 Tbsps. safflower oil (or your fat of choice ... I went with bacon grease this time)
1/4 cup chopped red onion
2 cloves garlic, minced
1/2 cup leftover veggies
3 Yukon gold potatoes, cut into small pieces and steamed
salt and pepper, to taste

Heat oil in a large cast iron skillet. Add red onion and garlic and saute over medium-high heat until onions begin to soften. Add the veggies and cook a few minutes longer. Add the potatoes, and cook until warmed through. Season with salt and pepper.

Serves 6 as a side dish. Serves 2-3 as a main course.

Blueberry Sauce

Serving pancakes with maple syrup is fine for Sunday morning breakfast with the family, but what do you do if you want to make breakfast a little more special? Try this blueberry sauce! It's incredibly easy and quick and it's actually healthier than syrup. Try it on pancakes, waffles, or french toast.

Blueberry Sauce
2 cups blueberries (fresh or frozen)
1 1/2 Tbsps. corn starch
1/4 cup agave nectar
1/4 cup water

Combine all ingredients in a saucepan. Bring to a bubble over medium-high heat. Rediuce heat to medium-low and cook, stirring frequently, for about 10 minutes, or until sauce thickens to a syrup.

Serves 6-8.

Mother's Day Menu

Most mothers are not too keen on cooking on their special day. Ordinarily, I wouldn't be either, but this year, with all of our food allergies, I decided to host a small mother's day brunch at my house. Honestly, it was nice to have a good, home-cooked meal for brunch, for a change, even if I was the one who had to make it. Here is what I served:

Barley & Buckwheat Pancakes with Blueberry Sauce
Greek Frittata
Potato & Veggie Hash
Crisp local organic bacon

We've had a few bottles of champagne sitting around, so we popped one open for mimosas, which added a little to the festive feel.

Happy mother's day to all! Every mother deserves at least one day to feel appreciated.

Saturday, May 8, 2010

The Case for National Organic Conversion

This week, the organic movement got some much-deserved media attention, primarily due to two bits of news: lettuce has been recalled due to contamination with e. coli, and the President's Cancer Panel issued a report advising the government to steer Americans away from chemical use. The latter news bite was discussed in a thoughtful op-ed piece by organic/sustainability/health advocate, Nicholas Kristof, of the NY Times. Will we now have the collective chutzpah to do something about the state of our food system in this country? And do we, in fact, know what to do?

Certainly, this is not the first time that nasty bacteria, like e. coli, has found its way into our food supply. These incidents are increasing in frequency and happening several times a year now. What follows after such an episode is that people hoot and holler about how screwed up food regulation is in this country, they avoid the latest infected product, they rely even more heavily on processed foods, and then they forget it ever happened. At the rate we're going, in a decade or two there will be nothing fresh left to eat and we'll all be reduced to consuming chemical compounds so far removed from the earth and the sun as to be completely unrecognizable as food. Some might say we're there already (think Twinkie!).

This is also not the first time that it has been brought to light that chemicals are not good for us. After all, such forward-thinking countries as Canada, Denmark and Belgium banned BPA (Bisphenol A) from baby bottles two years ago. There are numerous products on the market that boast that they contain no BPA, phthalates, or parabens, all endocrine disruptors, all having the potential to cause cancer, abnormal reproductive development or function, among other health concerns. Chlorine, one of the most widely used chemicals, is also one of the most volatile and dangerous to our environment, most notably our water supply, and this has been known for decades! The petrochemicals and nitrates contained in synthetic fertilizers, as well as the pesticides, herbicides, and fungicides used to grow conventional produce all absorb into our food, drain into our drinking water, and deplete the soil of nutrients so that every successive harvest affords fewer and fewer nutrients to consumers. That chemicals are now being recognized as cancer-causing is no shocking headline. So, why are we still using these things?

Although a small portion of the population has come to recognize that the food Americans eat is killing them, an even smaller group of people has decided to do something about it. Our complacency has got to stop! If the government recommended to the American public that they eat organic foods, as is suggested by the Cancer Panel, that would be a step in the right direction ... maybe. Here are my concerns:

- Suggesting to the American public that they steer clear of conventional foods will cause serious problems with the food system. There are far too few organic farms to support mass conversion to organic, and it takes three years for a conventional farm to transition to organic. Conventional farmers also don't know anything about organic farming, and educating all of them is a serious undertaking! Perhaps the way to go is through legislation. Just as the government created the mess we're in by subsidizing corn and soy, they can get us out of it by stopping those subsidies and incentivizing farmers to grow organic, polycultural crops and livestock. They can offer free education and support to them. When there is more organic food available, the cost will drop and it will become affordable to many more people.

- There are substances that are deemed illegal in this country (some that are far less dangerous than the chemicals that we consume daily). Why not simply make the chemicals that conventional farmers use illegal? Why allow the uneducated and the poor to kill themselves, while saving the wealthy and educated, who can afford organic food?

- Eating organic foods certainly helps with regard to getting the chemicals out of our environment and our bodies, but it's actually not at all helpful in reducing the risk of widespread bacterial contamination. Organic foods are just as susceptible to contamination as conventional foods. To reduce the risk of contamination, we need to do exactly the opposite of what the government is considering - we need to DE-centralize our food system. Although centralization is what makes food easier to monitor, it is also what causes the spread of disease. If food was processed in small facilities and in small batches all around the country, contamination would be limited to local, regional supplies, and not to multiple states. For the same reason, livestock should not be slaughtered and processed in large, centralized facilities. One sick cow could contaminate every McDonalds in the country!

- While the government is telling people what to eat, they ought to also encourage people to eat local. This is not just a matter of community support and loving thy neighbor. Eating local significantly reduces the likelihood of consuming bacteria-contaminated foods, as long as they are locally processed (or unprocessed), as well. It also increasing the nutrient content of food, because the food is fewer days away from harvest. Eating local also increases the likelihood of eating fresh, unprocessed foods, and skipping the junk which is making us so fat in this country. These are the benefits to individual health. There are also numerous environmental, financial, and even social benefits to eating locally. The government can do more than suggest that consumers buy local foods; they can harness the creative marketing energies of supermarket chains by incentivizing grocery stores to carry local goods (say, if you show that 30% of your products (or more) are sourced within a 100 mile radius, you get a tax break).

I think it's great that organic food is getting more and more attention these days. I only hope that the organic movement doesn't become diluted by the sheer numbers of joiners, and I hope that we lead this wave (rather than follow it) with purpose and care.